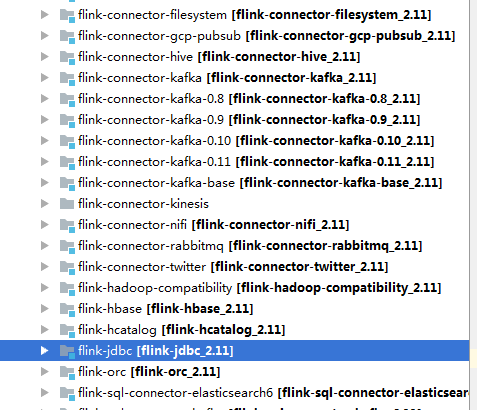
flink 中自身雖然實現了大量的connectors,如下圖所示,也實現了jdbc的connector,可以通過jdbc 去操作數據庫,但是flink-jdbc包中對數據庫的操作是以ROW來操作並且對數據庫事務的控制比較死板,有時候操作關係型數據庫我們會非常懷念在java web應用開發中的非常優秀的mybatis框架,那麼其實flink中是可以自己集成mybatis進來的。 我們這裏以flink 1.9版本為例來進行集成。
如下圖為flink內部自帶的flink-jdbc:
創建一個flink的流式處理項目,引入flink的maven依賴和mybatis依賴(注意這裏引入的是非spring版本,也就是mybatis的單機版):
<properties>

<flink.version>1.9.0</flink.version>
</properties>
<!-- https://mvnrepository.com/artifact/org.mybatis/mybatis -->
<dependency>
    <groupId>org.mybatis</groupId>
    <artifactId>mybatis</artifactId>
    <version>3.5.2</version>
</dependency>
<!-- flink java 包 -->
<dependency>
    <groupId>org.apache.flink</groupId>
    <artifactId>flink-streaming-java_2.11</artifactId>
    <version>${flink.version}</version>
</dependency>
maven依賴引入以後,那麼需要在resources下面定義mybatis-config.xml 配置:
mybatis-config.xml 需要定義如下配置:
<?xml version="1.0" encoding="UTF-8"?>
<!DOCTYPE configuration PUBLIC "-//mybatis.org//DTD Config 3.0//EN"
        "http://mybatis.org/dtd/mybatis-3-config.dtd">
<configuration>
    <typeAliases>
        <typeAlias alias="BankBillPublic" type="xxxx.xx.xx.BankBillPublic" />
    </typeAliases>
    <environments default="development">
        <environment id="development">
            <transactionManager type="JDBC" />
            <dataSource type="POOLED">
                <property name="driver" value="com.mysql.jdbc.Driver" />
                <property name="url" value="jdbc:mysql://xx.xx.xx.xx:3306/hue?characterEncoding=UTF-8&zeroDateTimeBehavior=convertToNull&allowMultiQueries=true&autoReconnect=true" />
                <property name="username" value="xxxx" />
                <property name="password" value="xxxx*123%" />
            </dataSource>
        </environment>
    </environments>
    <mappers>
        <mapper resource="mapper/xxxxxMapper.xml" />
    </mappers>
</configuration>
typeAlias 標籤中為自定義的數據類型,然後在xxxxxMapper.xml 中parameterType或者resultType就可以直接用這種定義的數據類型。
dataSource type=”POOLED” 我們使用的是mybatis中的POOLED 類型,也就是連接池的方式去使用。默認支持如下這三種類型。
我們也可以使用阿里巴巴開源的druid連接池,那麼就需要引入對應的maven依賴,如下所示:
        <dependency>
            <groupId>com.alibaba</groupId>
            <artifactId>druid</artifactId>
            <version>1.0.14</version>
        </dependency>
然後定義一個對應的druid的DataSource,如下所示:
import java.sql.SQLException;
import java.util.Properties;
import javax.sql.DataSource;
import org.apache.ibatis.datasource.DataSourceFactory;
import com.alibaba.druid.pool.DruidDataSource;

public class DruidDataSourceFactory implements DataSourceFactory {
    private Properties props;

    @Override
    public DataSource getDataSource() {
        DruidDataSource dds = new DruidDataSource();
        dds.setDriverClassName(this.props.getProperty("driver"));
        dds.setUrl(this.props.getProperty("url"));
        dds.setUsername(this.props.getProperty("username"));
        dds.setPassword(this.props.getProperty("password"));
        // 其他配置可以根據MyBatis主配置文件進行配置
        try {
            dds.init();
        } catch (SQLException e) {
            e.printStackTrace();
        }
        return dds;
    }

    @Override
    public void setProperties(Properties props) {
        this.props = props;
    }
}
之後就可以mybatis的配置中使用了,如下所示:
<?xml version="1.0" encoding="UTF-8"?>
<!DOCTYPE configuration PUBLIC "-//mybatis.org//DTD Config 3.0//EN"
        "http://mybatis.org/dtd/mybatis-3-config.dtd">
<configuration>
    <typeAliases>
        <typeAlias alias="BankBillPublic" type="xxxx.xx.xx.BankBillPublic" />
        <typeAlias alias="DRUID"
 type="com.xx.mybatis.druid.utils.DruidDataSourceFactory" />
    </typeAliases>
    <environments default="development">
        <environment id="development">
            <transactionManager type="JDBC" />
            <dataSource type="DRUID">
                <property name="driver" value="com.mysql.jdbc.Driver" />
                <property name="url" value="jdbc:mysql://xx.xx.xx.xx:3306/hue?characterEncoding=UTF-8&zeroDateTimeBehavior=convertToNull&allowMultiQueries=true&autoReconnect=true" />
                <property name="username" value="xxxx" />
                <property name="password" value="xxxx*123%" />
            </dataSource>
        </environment>
    </environments>
    <mappers>
        <mapper resource="mapper/xxxxxMapper.xml" />
    </mappers>
</configuration>
<mappers> 下面為定義的mybatis 的xxxxxMapper文件。裏面放置的都是sql語句。
本文作者張永清,轉載請註明出處:
xxxxxMapper.xml 中的sql示例:
<?xml version="1.0" encoding="UTF-8"?>
<!DOCTYPE mapper PUBLIC "-//mybatis.org//DTD Mapper 3.0//EN"
        "http://mybatis.org/dtd/mybatis-3-mapper.dtd">
<mapper namespace="xx.xx.bigdata.flink.xx.xx.mapper.UserRelaInfoMapper">
    <!--查詢關鍵字匹配 -->
    <select id="queryUserRelaInfo" parameterType="String" resultType="UserRelaInfo">
        SELECT id AS id,
        USER_NAME AS userName,
        APPL_IDCARD AS applIdCard,
        PEER_USER AS peerUser,
        RELA_TYPE AS relaType,
        CREATE_USER AS createUser,
        CREATE_TIME AS createTime
        FROM USER_RELA_INFO
        <where>
            <if test="applIdCard != null">
                APPL_IDCARD=#{applIdCard}
            </if>
            <if test="peerUser != null">
            AND PEER_USER=#{peerUser}
            </if>
        </where>
    </select>
</mapper>
定義Mapper,一般可以定義一個interface ,和xxxxxMapper.xml中的namespace保持一致
注意傳入的參數一般加上@Param 註解,傳入的參數和xxxxxMapper.xml中需要的參數保持一致
public interface UserRelaInfoMapper {
    List<UserRelaInfo> queryUserRelaInfo(@Param("applIdCard")String applIdCard,@Param("peerUser") String peerUser);
}
定義SessionFactory工廠(單例模式):
/**
 *
 *  sqlsession factory 單例  事務設置為手動提交
 */
public class MybatisSessionFactory {
    private static final Logger LOG = LoggerFactory.getLogger(MybatisSessionFactory.class);
    private static SqlSessionFactory sqlSessionFactory;
    private MybatisSessionFactory(){
        super();
    }
    public synchronized static SqlSessionFactory getSqlSessionFactory(){
        if(null==sqlSessionFactory){
            InputStream inputStream=null;
            try{
                inputStream = MybatisSessionFactory.class.getClassLoader().getResourceAsStream("mybatis-config.xml");
                sqlSessionFactory = new SqlSessionFactoryBuilder().build(inputStream);
            }
            catch (Exception e){
                LOG.error("create MybatisSessionFactory read mybatis-config.xml cause Exception",e);
            }
            if(null!=sqlSessionFactory){
                LOG.info("get Mybatis sqlsession sucessed....");
            }
            else {
                LOG.info("get Mybatis sqlsession failed....");
            }
        }
        return sqlSessionFactory;
    }
}
使用mybatis 對數據庫進行操作:
        SqlSession sqlSession = MybatisSessionFactory.getSqlSessionFactory().openSession();
        UserRelaInfoMapper  userRelaInfoMapper  = sqlSession.getMapper(UserRelaInfoMapper .class);
		//調用對應的方法
		userRelaInfoMapper.xxxx();
		//提交事務
		sqlSession.commit();
		//回滾事務,一般可以捕獲異常,在發生Exception的時候,事務進行回滾
		sqlSession.rollback();
這裏以mysql為示例,寫一個flink下mysql的sink示例,可以自己來靈活控制事務的提交:
public class MysqlSinkFunction<IN> extends RichSinkFunction {
    private static final Logger LOG = LoggerFactory.getLogger(MysqlSinkFunction.class);
    @Override
    public void invoke(Object value, Context context) throws Exception{
        SqlSession sqlSession = MybatisSessionFactory.getSqlSessionFactory().openSession();
        try{
                            //插入
                            LOG.info("MysqlSinkFunction start to do insert data...");
                            xxx.xxx();
							//更新
                            LOG.info("MysqlSinkFunction start to do update data...");
							xxx.xxx();
                            //刪除
                            LOG.info("MysqlSinkFunction start to do delete data...");
							xxx.xxx();


                sqlSession.commit();
                LOG.info("MysqlSinkFunction commit transaction success...");
        }
        catch (Throwable e){
            sqlSession.rollback();
            LOG.error("MysqlSinkFunction cause Exception,sqlSession transaction rollback...",e);
        }
    }
}
相信您如果以前在spring中用過mybatis的話,對上面的這些操作一定不會陌生。由此你也可以發現,在大數據中可以完美的集成mybatis,這樣可以發揮mybatis框架對數據庫操作的優勢,使用起來也非常簡單方便。
一旦集成了mybaitis后,在flink中就可以方便的對各種各樣的關係型數據庫進行操作了。
本文作者張永清,轉載請註明出處:
本站聲明:網站內容來源於博客園,如有侵權,請聯繫我們,我們將及時處理
【其他文章推薦】
※帶您來了解什麼是 USB CONNECTOR ?
※自行創業 缺乏曝光? 下一步”網站設計“幫您第一時間規劃公司的門面形象
※如何讓商品強力曝光呢? 網頁設計公司幫您建置最吸引人的網站,提高曝光率!!
※綠能、環保無空污,成為電動車最新代名詞,目前市場使用率逐漸普及化
※廣告預算用在刀口上,網站設計公司幫您達到更多曝光效益
※試算大陸海運運費!