maven系列目標:從入門開始開始掌握一個高級開發所需要的maven技能。
這是maven系列第6篇。
整個maven系列的內容前後是有依賴的,如果之前沒有接觸過maven,建議從第一篇看起,本文尾部有maven完整系列的連接。
前面我們使用maven過程中,用到了一些命令,如下:
mvn clean
mvn compile
mvn test
mvn package
mvn install
mvn install -Dmaven.test.skip=true
mvn deploy
mvn help:system
上面這些命令,如果你玩過maven,估計大家還是比較眼熟的,只是大家有沒有想過這些命令為什麼這麼寫,為什麼-Dmaven.test.skip=true可以跳過測試,大家需要知道mvn命令背後的一些原理,這就是本文的主要內容,廢話不多說,上乾貨。
本文主要內容
- 用戶自定義屬性的使用
- maven生命周期詳解
- maven插件詳解
用戶屬性Properties的使用
項目pom.xml中,有下面這樣一段依賴:
<dependencies>
    <dependency>
        <groupId>org.springframework</groupId>
        <artifactId>spring-core</artifactId>
        <version>5.2.1.RELEASE</version>
    </dependency>
    <dependency>
        <groupId>org.springframework</groupId>
        <artifactId>spring-beans</artifactId>
        <version>5.2.1.RELEASE</version>
    </dependency>
    <dependency>
        <groupId>org.springframework</groupId>
        <artifactId>spring-aop</artifactId>
        <version>5.2.1.RELEASE</version>
    </dependency>
</dependencies>
大家看一下上面的配置,有沒有什麼問題?
他們的groupId和version都是一樣的,程序員面對與重複的代碼,需要提取,如果是java代碼中,我們可以將同樣的代碼或者變量值,提取成方法或者變量,做到重用,方便維護。
那麼maven的pom.xml中也支持這麼做:
<properties>
    <spring.group>org.springframework</spring.group>
    <spring.version>5.2.1.RELEASE</spring.version>
</properties>

<dependencies>
    <dependency>
        <groupId>${spring.group}</groupId>
        <artifactId>spring-core</artifactId>
        <version>${spring.version}</version>
    </dependency>
    <dependency>
        <groupId>${spring.group}</groupId>
        <artifactId>spring-beans</artifactId>
        <version>${spring.version}</version>
    </dependency>
    <dependency>
        <groupId>${spring.group}</groupId>
        <artifactId>spring-aop</artifactId>
        <version>${spring.version}</version>
    </dependency>
</dependencies>
大家看一下上面的代碼,properties位於pom.xml中的,是project元素的子元素,用戶可以在properties中自定義一些用戶屬性,然後可以在其他地方使用${屬性名稱}這種方式進行引用。
生命周期
我們開發一個項目的時候,通常有這些環節:創建項目、編寫代碼、清理已編譯的代碼、編譯代碼、執行單元測試、打包、集成測試、驗證、部署、生成站點等,這些環節組成了項目的生命周期,這些過程也叫做項目的構建過程,幾乎所有的項目都由這些環節中的其中幾個,創建項目和編寫代碼是我們程序員需要多參与的,其他的都可以做成自動化的方式。
用過ant的朋友回憶一下,在maven出現以前,開發人員每天都在對項目進行清理、編譯、執行單元測試、打包、部署等操作,雖然大家都在做這些工作,但是沒有一個統一的標準,項目和項目之間,公司和公司之間,大多數都是各寫各的,寫法是千奇百怪,能滿足自身需求就可以了,但是換個項目就得從頭再來,這些操作又需要重新編寫腳本。
而maven出來之後,項目生命周期中的這些環節都被簡化了,被規範化了,maven出現之前,項目的結構沒有一個統一的標準,所以生命周期中各個環節對應的自動化腳本也是各種各樣,而maven約定好了項目的結構,源碼的位置、資源文件的位置、測試代碼的位置、測試用到的資源文件的位置、靜態資源的位置、打包之後文件的位置等,這些都是maven約定好的,所以清理代碼用一個命令mvn clean就可以完成,不需要我們去配置清理的目標目錄;用mvn compile命令就可以完成編譯的操作;用mvn test就可以自動運行測試用例;用mvn package就可以將項目打包為jar、war格式的包,能夠如此簡單,主要還是maven中約定大於配置的結果。
maven中生命周期詳解
maven將項目的生命周期抽象成了3套生命周期,每套生命周期又包含多個階段,每套中具體包含哪些階段是maven已經約定好的,但是每個階段具體需要做什麼,是用戶可以自己指定的。
maven中定義的3套生命周期:
- clean生命周期
- default生命周期
- site生命周期
上面這3套生命周期是相互獨立的,沒有依賴關係的,而每套生命周期中有多個階段,每套中的多個階段是有先後順序的,並且後面的階段依賴於前面的階段,而用戶可以直接使用mvn命令來調用這些階段去完成項目生命周期中具體的操作,命令是:
mvn 生命周期階段
通俗點解釋:
maven中的3套生命周期相當於maven定義了3個類來解決項目生命周期中需要的各種操作,每個類中有多個方法,這些方法就是指具體的階段,方法名稱就是階段的名稱,每個類的方法是有順序的,當執行某個方法的時候,這個方法前面的方法也會執行。具體每個方法中需要執行什麼,這個是通過插件的方式讓用戶去配置的,所以非常靈活。
用戶執行mvn 階段名稱就相當於調用了具體的某個方法。
下面我們來看看每個生命周期中有哪些階段(也就是我們說的每個類中有哪些方法,順序是什麼樣的)。
clean生命周期
clean生命周期的目的是清理項目,它包含三個階段:
| 生命周期階段 |
描述 |
| pre-clean |
執行一些需要在clean之前完成的工作 |
| clean |
移除所有上一次構建生成的文件 |
| post-clean |
執行一些需要在clean之後立刻完成的工作 |
用戶可以通過mvn pre-clean來調用clean生命周期中的pre-clean階段需要執行的操作。
調用mvn post-clean會執行上面3個階段所有的操作,上文中有說過,每個生命周期中的後面的階段會依賴於前面的階段,當執行某個階段的時候,會先執行其前面的階段。
default生命周期
這個是maven主要的生命周期,主要被用於構建應用,包含了23個階段。
| 生命周期階段 |
描述 |
| validate |
校驗:校驗項目是否正確並且所有必要的信息可以完成項目的構建過程。 |
| initialize |
初始化:初始化構建狀態,比如設置屬性值。 |
| generate-sources |
生成源代碼:生成包含在編譯階段中的任何源代碼。 |
| process-sources |
處理源代碼:處理源代碼,比如說,過濾任意值。 |
| generate-resources |
生成資源文件:生成將會包含在項目包中的資源文件。 |
| process-resources |
編譯:複製和處理資源到目標目錄,為打包階段最好準備。 |
| compile |
處理類文件:編譯項目的源代碼。 |
| process-classes |
處理類文件:處理編譯生成的文件,比如說對Java class文件做字節碼改善優化。 |
| generate-test-sources |
生成測試源代碼:生成包含在編譯階段中的任何測試源代碼。 |
| process-test-sources |
處理測試源代碼:處理測試源代碼,比如說,過濾任意值。 |
| generate-test-resources |
生成測試源文件:為測試創建資源文件。 |
| process-test-resources |
處理測試源文件:複製和處理測試資源到目標目錄。 |
| test-compile |
編譯測試源碼:編譯測試源代碼到測試目標目錄. |
| process-test-classes |
處理測試類文件:處理測試源碼編譯生成的文件。 |
| test |
測試:使用合適的單元測試框架運行測試(Juint是其中之一)。 |
| prepare-package |
準備打包:在實際打包之前,執行任何的必要的操作為打包做準備。 |
| package |
打包:將編譯后的代碼打包成可分發格式的文件,比如JAR、WAR或者EAR文件。 |
| pre-integration-test |
集成測試前:在執行集成測試前進行必要的動作。比如說,搭建需要的環境。 |
| integration-test |
集成測試:處理和部署項目到可以運行集成測試環境中。 |
| post-integration-test |
集成測試后:在執行集成測試完成後進行必要的動作。比如說,清理集成測試環境。 |
| verify |
驗證:運行任意的檢查來驗證項目包有效且達到質量標準。 |
| install |
安裝:安裝項目包到本地倉庫,這樣項目包可以用作其他本地項目的依賴。 |
| deploy |
部署:將最終的項目包複製到遠程倉庫中與其他開發者和項目共享。 |
site生命周期
site生命周期的目的是建立和發布項目站點,Maven能夠基於pom.xml所包含的信息,自動生成一個友好的站點,方便團隊交流和發布項目信息。主要包含以下4個階段:
| 階段 |
描述 |
| pre-site |
執行一些需要在生成站點文檔之前完成的工作 |
| site |
生成項目的站點文檔 |
| post-site |
執行一些需要在生成站點文檔之後完成的工作,並且為部署做準備 |
| site-deploy |
將生成的站點文檔部署到特定的服務器上 |
mvn命令和生命周期
從命令行執行maven任務的最主要方式就是調用maven生命周期的階段,需要注意的是,每套生命周期是相互獨立的,但是每套生命周期中階段是有前後依賴關係的,執行某個的時候,會按序先執行其前面所有的。
mvn執行階段的命令格式是:
mvn 階段1 [階段2] [階段n]
多個階段的名稱之間用空格隔開。
下面我們舉一些常見的例子來說明一下:
mvn clean
該命令是調用clean生命周期的clean階段,實際執行的階段為clean生命周期中的pre-clean和clean階段。
mvn test
該命令調用default生命周期的test階段,實際上會從default生命周期的第一個階段(validate)開始執行一直到test階段結束。這裏面包含了代碼的編譯,運行測試用例。
mvn clean install
這個命令中執行了兩個階段:clean和install,從上面3個生命周期的階段列表中找一下,可以看出clean位於clean生命周期的表格中,install位於default生命周期的表格中,所以這個命令會先從clean生命周期中的pre-clean階段開始執行一直到clean生命周期的clean階段;然後會繼續從default生命周期的validate階段開始執行一直到default生命周期的install階段。
這裏面包含了清理上次構建的結果,編譯代碼,測試,打包,將打好的包安裝到本地倉庫。
mvn clean deploy
這個命令也比較常用,會先按順序執行clean生命周期的[pre-clean,clean]這個閉區間內所有的階段,然後按序執行default生命周期的[validate,deploy]這個閉區間內的所有階段(也就是default生命周期中的所有階段)。這個命令內部包含了清理上次構建的結果、編譯代碼、運行單元測試、打包、將打好的包安裝到本地倉庫、將打好的包發布到私服倉庫。
上面說了這麼多理論,我們來看一下效果。
案例
創建一個maven項目
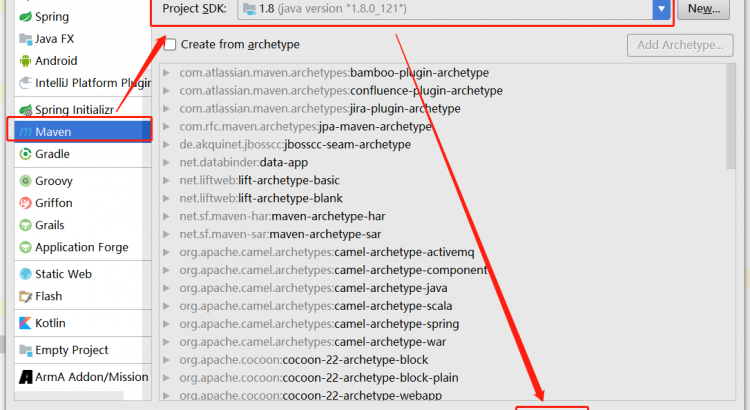
打開idea,點擊File->New->Project,選擇Maven,如下:
點擊Next,輸入項目坐標信息,如下:
點擊Next,輸入Project name 為maven-chat06,如下:
點擊Finish,創建成功,如下:
配置一下idea的maven環境,點擊File->Settings,如下圖:
點擊上面的OK完成配置。
還原~/.m2/settings.xml的配置到初始狀態,操作如下:
將M2_HOME/conf/settings.xml複製到~/.m2/settings.xml目錄,如果存在先備份一個,然後進行覆蓋。
maven項目是約定大於配置的,項目結構是按照maven的約定生成好的,關於maven約定項目結構,我們再來回顧一下。
Maven 提倡使用一個共同的標準目錄結構,Maven 使用約定優於配置的原則,大家盡可能的遵守這樣的目錄結構,如下所示:
| 目錄 |
目的 |
| ${basedir} |
存放pom.xml和所有的子目錄 |
| ${basedir}/src/main/java |
項目的java源代碼 |
| ${basedir}/src/main/resources |
項目的資源,比如說property文件,springmvc.xml |
| ${basedir}/src/test/java |
項目的測試類,比如說Junit代碼 |
| ${basedir}/src/test/resources |
測試用的資源 |
| ${basedir}/src/main/webapp/WEB-INF |
web應用文件目錄,web項目的信息,比如存放web.xml、本地圖片、jsp視圖頁面 |
| ${basedir}/target |
打包輸出目錄 |
| ${basedir}/target/classes |
編譯輸出目錄 |
| ${basedir}/target/test-classes |
測試編譯輸出目錄 |
| Test.java |
Maven只會自動運行符合該命名規則的測試類 |
| ~/.m2/repository |
Maven默認的本地倉庫目錄位置 |
結合剛才項目的結構和這個表格領會一下,下面我們來感受一下執行生命周期中的階段產生的效果。
修改pom.xml,如下:
<?xml version="1.0" encoding="UTF-8"?>
<project xmlns="http://maven.apache.org/POM/4.0.0"
         xmlns:xsi="http://www.w3.org/2001/XMLSchema-instance"
         xsi:schemaLocation="http://maven.apache.org/POM/4.0.0 http://maven.apache.org/xsd/maven-4.0.0.xsd">
    <modelVersion>4.0.0</modelVersion>

    <groupId>com.javacode2018</groupId>
    <artifactId>maven-chat06</artifactId>
    <version>1.0-SNAPSHOT</version>
    <packaging>jar</packaging>
    <properties>
        <project.build.sourceEncoding>UTF-8</project.build.sourceEncoding>
        <!-- 配置maven編譯的時候採用的編譯器版本 -->
        <maven.compiler.compilerVersion>1.8</maven.compiler.compilerVersion>
        <!-- 指定源代碼是什麼版本的,如果源碼和這個版本不符將報錯,maven中執行編譯的時候會用到這個配置,默認是1.5,這個相當於javac命令後面的-source參數 -->
        <maven.compiler.source>1.8</maven.compiler.source>
        <!-- 該命令用於指定生成的class文件將保證和哪個版本的虛擬機進行兼容,maven中執行編譯的時候會用到這個配置,默認是1.5,這個相當於javac命令後面的-target參數 -->
        <maven.compiler.target>1.8</maven.compiler.target>
    </properties>

    <dependencies>
        <dependency>
            <groupId>junit</groupId>
            <artifactId>junit</artifactId>
            <version>4.12</version>
            <scope>test</scope>
        </dependency>
    </dependencies>

</project>
上面properties這個元素中的配置,可能大家看不懂,先略過,後面會詳解。
創建一個Demo類,源碼是放在src/main/java目錄中,如下:
package com.javacode2018.maven;

import java.util.ArrayList;
import java.util.List;

public class Demo1 {
    public static void main(String[] args) {
        System.out.println("歡迎和【路人甲java】一起學習maven,帶你成為maven高手!");
        List<Integer> list = new ArrayList<>();
        for (int i = 0; i < 5; i++) {
            list.add(i);
        }
        list.forEach(System.out::print);
    }
}
mvn clean命令效果
在當前項目pom.xml所在目錄中執行下面命令:
mvn clean
效果如下:
D:\code\IdeaProjects\maven-chat06>mvn clean
[INFO] Scanning for projects...
[INFO]
[INFO] -------------------< com.javacode2018:maven-chat06 >--------------------
[INFO] Building maven-chat06 1.0-SNAPSHOT
[INFO] --------------------------------[ jar ]---------------------------------
[INFO]
[INFO] --- maven-clean-plugin:2.5:clean (default-clean) @ maven-chat06 ---
[INFO] Deleting D:\code\IdeaProjects\maven-chat06\target
[INFO] ------------------------------------------------------------------------
[INFO] BUILD SUCCESS
[INFO] ------------------------------------------------------------------------
[INFO] Total time:  0.477 s
[INFO] Finished at: 2019-11-15T18:46:13+08:00
[INFO] ------------------------------------------------------------------------
上面有提到編譯、打包的內容都放在target目錄,看上面輸出中有個Deleting target目錄,說明mvn clean是對這個目錄進行清理,這個目錄中目前是空的。
mvn compile命令效果
先看一下項目的目錄中是沒有target目錄的,如下圖:
cmd中執行:
mvn compile
輸出:
D:\code\IdeaProjects\maven-chat06>mvn compile
[INFO] Scanning for projects...
[INFO]
[INFO] -------------------< com.javacode2018:maven-chat06 >--------------------
[INFO] Building maven-chat06 1.0-SNAPSHOT
[INFO] --------------------------------[ jar ]---------------------------------
[INFO]
[INFO] --- maven-resources-plugin:2.6:resources (default-resources) @ maven-chat06 ---
[INFO] Using 'UTF-8' encoding to copy filtered resources.
[INFO] Copying 0 resource
[INFO]
[INFO] --- maven-compiler-plugin:3.1:compile (default-compile) @ maven-chat06 ---
[INFO] Changes detected - recompiling the module!
[INFO] Compiling 1 source file to D:\code\IdeaProjects\maven-chat06\target\classes
[INFO] ------------------------------------------------------------------------
[INFO] BUILD SUCCESS
[INFO] ------------------------------------------------------------------------
[INFO] Total time:  1.897 s
[INFO] Finished at: 2019-11-15T18:53:12+08:00
[INFO] ------------------------------------------------------------------------
可以看到上面有Compiling 1 source ....,這個是編譯Demo.java,然後輸出到了target中的classes目錄,再來看一下項目的結構,如下圖:
上圖中匡紅的是新生成的。
mvn clean package效果
D:\code\IdeaProjects\maven-chat06>mvn clean package
[INFO] Scanning for projects...
[INFO]
[INFO] -------------------< com.javacode2018:maven-chat06 >--------------------
[INFO] Building maven-chat06 1.0-SNAPSHOT
[INFO] --------------------------------[ jar ]---------------------------------
[INFO]
[INFO] --- maven-clean-plugin:2.5:clean (default-clean) @ maven-chat06 ---
[INFO] Deleting D:\code\IdeaProjects\maven-chat06\target
[INFO]
[INFO] --- maven-resources-plugin:2.6:resources (default-resources) @ maven-chat06 ---
[INFO] Using 'UTF-8' encoding to copy filtered resources.
[INFO] Copying 0 resource
[INFO]
[INFO] --- maven-compiler-plugin:3.1:compile (default-compile) @ maven-chat06 ---
[INFO] Changes detected - recompiling the module!
[INFO] Compiling 1 source file to D:\code\IdeaProjects\maven-chat06\target\classes
[INFO]
[INFO] --- maven-resources-plugin:2.6:testResources (default-testResources) @ maven-chat06 ---
[INFO] Using 'UTF-8' encoding to copy filtered resources.
[INFO] Copying 0 resource
[INFO]
[INFO] --- maven-compiler-plugin:3.1:testCompile (default-testCompile) @ maven-chat06 ---
[INFO] Nothing to compile - all classes are up to date
[INFO]
[INFO] --- maven-surefire-plugin:2.12.4:test (default-test) @ maven-chat06 ---
[INFO]
[INFO] --- maven-jar-plugin:2.4:jar (default-jar) @ maven-chat06 ---
[INFO] Building jar: D:\code\IdeaProjects\maven-chat06\target\maven-chat06-1.0-SNAPSHOT.jar
[INFO] ------------------------------------------------------------------------
[INFO] BUILD SUCCESS
[INFO] ------------------------------------------------------------------------
[INFO] Total time:  2.177 s
[INFO] Finished at: 2019-11-15T18:56:59+08:00
[INFO] ------------------------------------------------------------------------
從輸出中看一下,有個Building jar ...,生成了一個jar包,這個項目的pom.xml中的packaging元素沒有指定值,那就取默認值jar,表示這個構件是一個jar包,mvn clean package先清理編譯的代碼,然後執行了default生命周期的compile階段,將項目打成了jar放在了target目錄,如下圖:
大家看到上面還有很多其他的輸出,這個大家可以先忽略,本文看完了,都會明白的。
mvn clean install效果
D:\code\IdeaProjects\maven-chat06>mvn clean install
[INFO] Scanning for projects...
[INFO]
[INFO] -------------------< com.javacode2018:maven-chat06 >--------------------
[INFO] Building maven-chat06 1.0-SNAPSHOT
[INFO] --------------------------------[ jar ]---------------------------------
[INFO]
[INFO] --- maven-clean-plugin:2.5:clean (default-clean) @ maven-chat06 ---
[INFO] Deleting D:\code\IdeaProjects\maven-chat06\target
[INFO]
[INFO] --- maven-resources-plugin:2.6:resources (default-resources) @ maven-chat06 ---
[INFO] Using 'UTF-8' encoding to copy filtered resources.
[INFO] Copying 0 resource
[INFO]
[INFO] --- maven-compiler-plugin:3.1:compile (default-compile) @ maven-chat06 ---
[INFO] Changes detected - recompiling the module!
[INFO] Compiling 1 source file to D:\code\IdeaProjects\maven-chat06\target\classes
[INFO]
[INFO] --- maven-resources-plugin:2.6:testResources (default-testResources) @ maven-chat06 ---
[INFO] Using 'UTF-8' encoding to copy filtered resources.
[INFO] Copying 0 resource
[INFO]
[INFO] --- maven-compiler-plugin:3.1:testCompile (default-testCompile) @ maven-chat06 ---
[INFO] Nothing to compile - all classes are up to date
[INFO]
[INFO] --- maven-surefire-plugin:2.12.4:test (default-test) @ maven-chat06 ---
[INFO]
[INFO] --- maven-jar-plugin:2.4:jar (default-jar) @ maven-chat06 ---
[INFO] Building jar: D:\code\IdeaProjects\maven-chat06\target\maven-chat06-1.0-SNAPSHOT.jar
[INFO]
[INFO] --- maven-install-plugin:2.4:install (default-install) @ maven-chat06 ---
[INFO] Installing D:\code\IdeaProjects\maven-chat06\target\maven-chat06-1.0-SNAPSHOT.jar to C:\Users\Think\.m2\repository\com\javacode2018\maven-chat06\1.0-SNAPSHOT\maven-chat06-1.0-SNAPSHOT.jar
[INFO] Installing D:\code\IdeaProjects\maven-chat06\pom.xml to C:\Users\Think\.m2\repository\com\javacode2018\maven-chat06\1.0-SNAPSHOT\maven-chat06-1.0-SNAPSHOT.pom
[INFO] ------------------------------------------------------------------------
[INFO] BUILD SUCCESS
[INFO] ------------------------------------------------------------------------
[INFO] Total time:  2.977 s
[INFO] Finished at: 2019-11-15T19:05:21+08:00
[INFO] ------------------------------------------------------------------------
和mvn clean package的輸出對比一下,多了幾行輸出,主要是多了2個Installing...,將項目打成jar包以及項目的pom文件放到本地倉庫去了,也就是將構件打包安裝到本地倉庫了。
上面幾個mvn命令的案例,都是通過mvn命令去執行了mvn中定義的生命周期中的階段,然後完成了很多看似內部很複雜的操作。比如打包,內部包含很多複雜的操作,maven都幫我們屏蔽了,通過一個簡單的mvn package就完成了。
上面也有說過,每個階段具體做的事情是由maven插件來完成的。
我們在回頭看一下上面一個輸出中,有很多類似於maven-xxxx-plugin:版本:xxx這樣的內容,這個就是表示當前在運行這個插件來完成對應階段的操作,mvn 階段明明執行的是階段,但是實際輸出中確實插件在幹活,那麼階段是如何和插件關聯起來的呢?插件又是什麼呢?
注意以下所有命令都在cmd窗口執行,執行位置位於上面這個項目的pom.xml所在目錄。
Maven插件
maven插件主要是為maven中生命周期中的階段服務的,maven中只是定義了3套生命周期,以及每套生命周期中有哪些階段,具體每個階段中執行什麼操作,完全是交給插件去乾的。
maven中的插件就相當於一些工具,比如編譯代碼的工具,運行測試用例的工具,打包代碼的工具,將代碼上傳到本地倉庫的工具,將代碼部署到遠程倉庫的工具等等,這些都是maven中的插件。
插件可以通過mvn命令的方式調用直接運行,或者將插件和maven生命周期的階段進行綁定,然後通過mvn 階段的方式執行階段的時候,會自動執行和這些階段綁定的插件。
插件目標
maven中的插件以jar的方式存在於倉庫中,和其他構件是一樣的,也是通過坐標進行訪問,每個插件中可能為了代碼可以重用,一個插件可能包含了多個功能,比如編譯代碼的插件,可以編譯源代碼、也可以編譯測試代碼;插件中的每個功能就叫做插件的目標(Plugin Goal),每個插件中可能包含一個或者多個插件目標(Plugin Goal)。
目標參數
插件目標是用來執行任務的,那麼執行任務肯定是有參數配的,這些就是目標的參數,每個插件目標對應於java中的一個類,參數就對應於這個類中的屬性。
列出插件所有目標
mvn 插件goupId:插件artifactId[:插件version]:help
mvn 插件前綴:help
上面插件前綴的先略過,我們先看第一種效果。
如:
D:\code\IdeaProjects\maven-chat06>mvn org.apache.maven.plugins:maven-clean-plugin:help
[INFO] Scanning for projects...
[INFO]
[INFO] -------------------< com.javacode2018:maven-chat06 >--------------------
[INFO] Building maven-chat06 1.0-SNAPSHOT
[INFO] --------------------------------[ jar ]---------------------------------
[INFO]
[INFO] --- maven-clean-plugin:2.5:help (default-cli) @ maven-chat06 ---
[INFO] org.apache.maven.plugins:maven-clean-plugin:2.5

Maven Clean Plugin
  The Maven Clean Plugin is a plugin that removes files generated at build-time
  in a project's directory.

This plugin has 2 goals:

clean:clean
  Goal which cleans the build.
  This attempts to clean a project's working directory of the files that were
  generated at build-time. By default, it discovers and deletes the directories
  configured in project.build.directory, project.build.outputDirectory,
  project.build.testOutputDirectory, and project.reporting.outputDirectory.

  Files outside the default may also be included in the deletion by configuring
  the filesets tag.

clean:help
  Display help information on maven-clean-plugin.
  Call
    mvn clean:help -Ddetail=true -Dgoal=<goal-name>
  to display parameter details.
上面列出了maven-clean-plugin這個插件所有的目標,有2個,分別是clean:clean、clean:help,分號後面的部分是目標名稱,分號前面的部分是插件的前綴,每個目標的後面包含對這個目標的詳細解釋說明,關於前綴的後面會有詳細介紹。
查看插件目標參數列表
mvn 插件goupId:插件artifactId[:插件version]:help -Dgoal=目標名稱 -Ddetail
mvn 插件前綴:help -Dgoal=目標名稱 -Ddetail
上面命令中的-Ddetail用戶輸出目標詳細的參數列表信息,如果沒有這個,目標的參數列表不會輸出出來,看效果。
如:
D:\code\IdeaProjects\maven-chat06>mvn org.apache.maven.plugins:maven-clean-plugin:help -Dgoal=help -Ddetail
[INFO] Scanning for projects...
[INFO]
[INFO] -------------------< com.javacode2018:maven-chat06 >--------------------
[INFO] Building maven-chat06 1.0-SNAPSHOT
[INFO] --------------------------------[ jar ]---------------------------------
[INFO]
[INFO] --- maven-clean-plugin:2.5:help (default-cli) @ maven-chat06 ---
[INFO] org.apache.maven.plugins:maven-clean-plugin:2.5

Maven Clean Plugin
  The Maven Clean Plugin is a plugin that removes files generated at build-time
  in a project's directory.

clean:help
  Display help information on maven-clean-plugin.
  Call
    mvn clean:help -Ddetail=true -Dgoal=<goal-name>
  to display parameter details.

  Available parameters:

    detail (Default: false)
      If true, display all settable properties for each goal.
      Expression: ${detail}

    goal
      The name of the goal for which to show help. If unspecified, all goals
      will be displayed.
      Expression: ${goal}

    indentSize (Default: 2)
      The number of spaces per indentation level, should be positive.
      Expression: ${indentSize}

    lineLength (Default: 80)
      The maximum length of a display line, should be positive.
      Expression: ${lineLength}
上面列出了clean插件的help目標的詳細參數信息。
注意上面參數詳細參數說明中有Expression: ${xxx}這樣的部分,這種表示給這個運行的目標傳參,可以通過mvn -Dxxx這種方式傳參,xxx為${xxx}中的xxx部分,這個xxx有時候和目標參數的名稱不一致,所以這點需要注意,運行帶參數的目標,看一下效果:
D:\code\IdeaProjects\maven-chat06>mvn org.apache.maven.plugins:maven-clean-plugin:help -Dgoal=help -Ddetail=false
[INFO] Scanning for projects...
[INFO]
[INFO] -------------------< com.javacode2018:maven-chat06 >--------------------
[INFO] Building maven-chat06 1.0-SNAPSHOT
[INFO] --------------------------------[ jar ]---------------------------------
[INFO]
[INFO] --- maven-clean-plugin:2.5:help (default-cli) @ maven-chat06 ---
[INFO] org.apache.maven.plugins:maven-clean-plugin:2.5

Maven Clean Plugin
  The Maven Clean Plugin is a plugin that removes files generated at build-time
  in a project's directory.

clean:help
  Display help information on maven-clean-plugin.
  Call
    mvn clean:help -Ddetail=true -Dgoal=<goal-name>
  to display parameter details.


[INFO] ------------------------------------------------------------------------
[INFO] BUILD SUCCESS
[INFO] ------------------------------------------------------------------------
[INFO] Total time:  0.332 s
[INFO] Finished at: 2019-11-18T15:14:56+08:00
[INFO] ------------------------------------------------------------------------
上面傳了一個detail=false,上面未輸出目標的詳細參數信息。
命令行運行插件
mvn 插件goupId:插件artifactId[:插件version]:插件目標 [-D目標參數1] [-D目標參數2] [-D目標參數n]
mvn 插件前綴:插件目標  [-D目標參數1] [-D目標參數2] [-D目標參數n]
案例:
maven中運行測試用例使用到的插件坐標是:
<dependency>
    <groupId>org.apache.maven.plugins</groupId>
    <artifactId>maven-surefire-plugin</artifactId>
    <version>2.12.4</version>
</dependency>
我們看一下這個插件有哪些目標:
D:\code\IdeaProjects\maven-chat06>mvn org.apache.maven.plugins:maven-surefire-plugin:help
[INFO] Scanning for projects...
[INFO]
[INFO] -------------------< com.javacode2018:maven-chat06 >--------------------
[INFO] Building maven-chat06 1.0-SNAPSHOT
[INFO] --------------------------------[ jar ]---------------------------------
[INFO]
[INFO] --- maven-surefire-plugin:2.12.4:help (default-cli) @ maven-chat06 ---
[INFO] Maven Surefire Plugin 2.12.4
  Surefire is a test framework project.

This plugin has 2 goals:

surefire:help
  Display help information on maven-surefire-plugin.
  Call mvn surefire:help -Ddetail=true -Dgoal=<goal-name> to display parameter
  details.

surefire:test
  Run tests using Surefire.


[INFO] ------------------------------------------------------------------------
[INFO] BUILD SUCCESS
[INFO] ------------------------------------------------------------------------
[INFO] Total time:  0.662 s
[INFO] Finished at: 2019-11-18T15:26:26+08:00
[INFO] ------------------------------------------------------------------------
maven-surefire-plugin插件有2個目標help和test,描述中可以看出test目標是用來運行測試用例的。
我們看一下test目標對應的參數列表:
test目標對應的參數太多,我們只列出了部分參數,如下:
D:\code\IdeaProjects\maven-chat06>mvn org.apache.maven.plugins:maven-surefire-plugin:help -Dgoal=test -Ddetail=true
[INFO] Scanning for projects...
[INFO]
[INFO] -------------------< com.javacode2018:maven-chat06 >--------------------
[INFO] Building maven-chat06 1.0-SNAPSHOT
[INFO] --------------------------------[ jar ]---------------------------------
[INFO]
[INFO] --- maven-surefire-plugin:2.12.4:help (default-cli) @ maven-chat06 ---
[INFO] Maven Surefire Plugin 2.12.4
  Surefire is a test framework project.

surefire:test
  Run tests using Surefire.

  Available parameters:

    skip (Default: false)
      Set this to 'true' to bypass unit tests entirely. Its use is NOT
      RECOMMENDED, especially if you enable it using the 'maven.test.skip'
      property, because maven.test.skip disables both running the tests and
      compiling the tests. Consider using the skipTests parameter instead.
大家認真看一下skip這個參數說明,這個參數默認是false,如果設置為true的時候,項目將跳過測試代碼的編譯和測試用例的執行,可以maven.test.skip這個屬性來進行命令行傳參,將其傳遞給test目標的skip屬性,這個通過-D傳遞的參數名稱就和目標參數名稱不一樣了,所以需要注意-D後面並不一定是參數名稱。
我們來運行一下test目標看看效果。
先看一下不加參數的效果:
D:\code\IdeaProjects\maven-chat06>mvn org.apache.maven.plugins:maven-surefire-plugin:test
[INFO] Scanning for projects...
[INFO]
[INFO] -------------------< com.javacode2018:maven-chat06 >--------------------
[INFO] Building maven-chat06 1.0-SNAPSHOT
[INFO] --------------------------------[ jar ]---------------------------------
[INFO]
[INFO] --- maven-surefire-plugin:2.12.4:test (default-cli) @ maven-chat06 ---
[INFO] ------------------------------------------------------------------------
[INFO] BUILD SUCCESS
[INFO] ------------------------------------------------------------------------
[INFO] Total time:  0.640 s
[INFO] Finished at: 2019-11-18T15:33:48+08:00
[INFO] ------------------------------------------------------------------------
加maven.skip.test=true的效果如下:
D:\code\IdeaProjects\maven-chat06>mvn org.apache.maven.plugins:maven-surefire-plugin:test -Dmaven.test.skip=true
[INFO] Scanning for projects...
[INFO]
[INFO] -------------------< com.javacode2018:maven-chat06 >--------------------
[INFO] Building maven-chat06 1.0-SNAPSHOT
[INFO] --------------------------------[ jar ]---------------------------------
[INFO]
[INFO] --- maven-surefire-plugin:2.12.4:test (default-cli) @ maven-chat06 ---
[INFO] Tests are skipped.
[INFO] ------------------------------------------------------------------------
[INFO] BUILD SUCCESS
[INFO] ------------------------------------------------------------------------
[INFO] Total time:  0.652 s
[INFO] Finished at: 2019-11-18T15:34:45+08:00
[INFO] ------------------------------------------------------------------------
對比一下上面2個輸出,下面的多了一行如下:
[INFO] Tests are skipped.
說明跳過了測試的執行。
插件傳參的2種方式
剛才上面講了一種通過-D後面跟用戶屬性的方式給用戶傳參,還有一種方式,在pom.xml中properties的用戶自定義屬性中進行配置,如下:
修改項目maven-chat06的pom.xml,properties中加入:
<maven.test.skip>true</maven.test.skip>
cmd中運行:
mvn org.apache.maven.plugins:maven-surefire-plugin:test
效果如下:
D:\code\IdeaProjects\maven-chat06>mvn org.apache.maven.plugins:maven-surefire-plugin:test
[INFO] Scanning for projects...
[INFO]
[INFO] -------------------< com.javacode2018:maven-chat06 >--------------------
[INFO] Building maven-chat06 1.0-SNAPSHOT
[INFO] --------------------------------[ jar ]---------------------------------
[INFO]
[INFO] --- maven-surefire-plugin:2.12.4:test (default-cli) @ maven-chat06 ---
[INFO] Tests are skipped.
[INFO] ------------------------------------------------------------------------
[INFO] BUILD SUCCESS
[INFO] ------------------------------------------------------------------------
[INFO] Total time:  0.638 s
[INFO] Finished at: 2019-11-18T15:46:04+08:00
[INFO] ------------------------------------------------------------------------
輸出中也有Tests are skipped.,說明也跳過了測試,和-Dmaven.test.skip=true效果一樣。
上面說的都是插件目標的東西,那麼插件目標是如何和生命周期關聯起來的呢?繼續向下看。
獲取插件目標詳細描述信息的另外一種方式
mvn help:describe -Dplugin=插件goupId:插件artifactId[:插件version] -Dgoal=目標名稱 -Ddetail
mvn help:describe -Dplugin=插件前綴 -Dgoal=目標名稱 -Ddetail
上面這個命令調用的是help插件的describe這個目標,這個目標可以列出其他指定插件目標的詳細信息,看效果:
D:\code\IdeaProjects\maven-chat06>mvn help:describe -Dplugin=org.apache.maven.plugins:maven-surefire-plugin -Dgoal=test -Ddetail
[INFO] Scanning for projects...
[INFO]
[INFO] -------------------< com.javacode2018:maven-chat06 >--------------------
[INFO] Building maven-chat06 1.0-SNAPSHOT
[INFO] --------------------------------[ jar ]---------------------------------
[INFO]
[INFO] --- maven-help-plugin:3.2.0:describe (default-cli) @ maven-chat06 ---
[INFO] Mojo: 'surefire:test'
surefire:test
  Description: Run tests using Surefire.
  Implementation: org.apache.maven.plugin.surefire.SurefirePlugin
  Language: java
  Bound to phase: test

  Available parameters:

    additionalClasspathElements
      Additional elements to be appended to the classpath.

    argLine
      User property: argLine
      Arbitrary JVM options to set on the command line.

    skip (Default: false)
      User property: maven.test.skip
      Set this to 'true' to bypass unit tests entirely. Its use is NOT
      RECOMMENDED, especially if you enable it using the 'maven.test.skip'
      property, because maven.test.skip disables both running the tests and
      compiling the tests. Consider using the skipTests parameter instead.
可以拿這種和上面獲取插件目標參數詳情列表對比一下,上面這個更詳細一些,參數說明中多了一行User property: 屬性名稱,這個屬性名稱可以通過兩種方式傳遞:
- mvn命令
-D屬性名稱的方式傳遞
- pom.xml中
properties中定義的方式指定。
現在可以大家估計可以知道我們一直用的-Dmaven.test.skip為什麼可以跳過測試代碼的編譯和單元測試的執行了吧。
插件前綴
運行插件的時候,可以通過指定插件坐標的方式運行,但是插件的坐標信息過於複雜,也不方便寫和記憶,所以maven中給插件定義了一些簡捷的插件前綴,可以通過插件前綴來運行指定的插件。
可以通過下面命令查看到插件的前綴:
mvn help:describe -Dplugin=插件goupId:插件artifactId[:插件version]
示例效果:
D:\code\IdeaProjects\maven-chat06>mvn help:describe -Dplugin=org.apache.maven.plugins:maven-surefire-plugin
[INFO] Scanning for projects...
[INFO]
[INFO] -------------------< com.javacode2018:maven-chat06 >--------------------
[INFO] Building maven-chat06 1.0-SNAPSHOT
[INFO] --------------------------------[ jar ]---------------------------------
[INFO]
[INFO] --- maven-help-plugin:3.2.0:describe (default-cli) @ maven-chat06 ---
[INFO] org.apache.maven.plugins:maven-surefire-plugin:2.12.4

Name: Maven Surefire Plugin
Description: Surefire is a test framework project.
Group Id: org.apache.maven.plugins
Artifact Id: maven-surefire-plugin
Version: 2.12.4
Goal Prefix: surefire
輸出中的Goal Prefix:部分對應的就是插件的前綴,上面這個插件的前綴是surefire。
我們使用前綴來運行一下插件感受一下效果:
D:\code\IdeaProjects\maven-chat06>mvn surefire:test
[INFO] Scanning for projects...
[INFO]
[INFO] -------------------< com.javacode2018:maven-chat06 >--------------------
[INFO] Building maven-chat06 1.0-SNAPSHOT
[INFO] --------------------------------[ jar ]---------------------------------
[INFO]
[INFO] --- maven-surefire-plugin:2.12.4:test (default-cli) @ maven-chat06 ---
[INFO] Tests are skipped.
[INFO] ------------------------------------------------------------------------
[INFO] BUILD SUCCESS
[INFO] ------------------------------------------------------------------------
[INFO] Total time:  0.934 s
[INFO] Finished at: 2019-11-18T16:18:42+08:00
[INFO] ------------------------------------------------------------------------
上面通過別名來運行插件maven-surefire-plugin的test目標,是不是簡潔了很多。
上面用了很多mvn help:這個命令,這個調用的是maven-help-plugin插件的功能,help是插件的前綴,它的坐標是:
<dependency>
    <groupId>org.apache.maven.plugins</groupId>
    <artifactId>maven-help-plugin</artifactId>
    <version>3.2.0</version>
</dependency>
插件和生命周期階段綁定
maven只是定義了生命周期中的階段,而沒有定義每個階段中具體的實現,這些實現是由插件的目標來完成的,所以需要將階段和插件目標進行綁定,來讓插件目標幫助生命周期的階段做具體的工作,生命周期中的每個階段支持綁定多個插件的多個目標。
當我們將生命周期中的階段和插件的目標進行綁定的時候,執行mvn 階段就可以執行和這些階段綁定的插件目標。
maven內置插件以及綁定
maven為了讓我們不用做任何配置就可以實現一些項目的構建操作,比如運行mvn clean就可以幫我們清理代碼,運行mvn install就可以將構件安裝到本地倉庫,所以maven幫我們做了一些事情,maven內部已經提供了很多默認的插件,而將一些階段默認和這些插件階段綁定好了,所以我們不用做任何配置就可以執行清理代碼、編譯代碼、測試、打包、安裝到本地倉庫、上傳到遠程倉庫等階段的操作,是因為maven已經默認給這些階段綁定好了插件目標,所以不需要我們再去配置,就直接可以運行,這些都是maven內置綁定幫我們做的事情,我們來看看maven有哪些內置綁定。
maven內置綁定
clean生命周期階段與插件綁定關係
| 生命周期階段 |
插件:目標 |
| pre-clean |
|
| clean |
maven-clean-plugin:clean |
| post-clean |
|
clean周期中只有clean階段默認綁定了maven-clean-plugin插件的clean目標。maven-clean-plugin插件的clean目標作用就是刪除項目的輸出目錄。
default生命周期階段與插件綁定關係
default生命周期中有23個階段,我只列出有默認綁定的,其他的沒有列出的沒有綁定任何插件,因此沒有任何實際的行為。
| 生命周期階段 |
插件:目標 |
執行任務 |
| process-resources |
maven-resources-plugin:resources |
複製主資源文件至主輸出目錄 |
| compile |
maven-compiler-plugin:compile |
編譯主代碼至主輸出目錄 |
| process-test-resources |
maven-resources-plugin:testResources |
複製測試資源文件至測試輸出目錄 |
| test-compile |
maven-compiler-plugin:testCompile |
編譯測試代碼至測試輸出目錄 |
| test |
maven-surefile-plugin:test |
執行測試用例 |
| package |
maven-jar-plugin:jar |
創建項目jar包 |
| install |
maven-install-plugin:install |
將輸出構件安裝到本地倉庫 |
| deploy |
maven-deploy-plugin:deploy |
將輸出的構件部署到遠程倉庫 |
site生命周期階段與插件綁定關係
| 生命周期階段 |
插件:目標 |
| pre-site |
|
| site |
maven-site-plugin:site |
| post-site |
|
| site-deploy |
maven-site-plugin:deploy |
來幾個案例解說一下。
mvn clean
該命令是調用clean生命周期的clean階段,實際執行的階段為clean生命周期中的pre-clean和clean階段,從上面內置綁定表格中找一下,可以看到只有clean階段綁定了maven-clean-plugin插件的clean目標,所以運行mvn clean的時候,實際上會調用maven-clean-plugin插件的clean目標來清理代碼。
運行一下看一下效果:
D:\code\IdeaProjects\maven-chat06>mvn clean
[INFO] Scanning for projects...
[INFO]
[INFO] -------------------< com.javacode2018:maven-chat06 >--------------------
[INFO] Building maven-chat06 1.0-SNAPSHOT
[INFO] --------------------------------[ jar ]---------------------------------
[INFO]
[INFO] --- maven-clean-plugin:2.5:clean (default-clean) @ maven-chat06 ---
[INFO] Deleting D:\code\IdeaProjects\maven-chat06\target
[INFO] ------------------------------------------------------------------------
[INFO] BUILD SUCCESS
[INFO] ------------------------------------------------------------------------
[INFO] Total time:  0.408 s
[INFO] Finished at: 2019-11-18T16:34:14+08:00
[INFO] ------------------------------------------------------------------------
上面有一行輸出如下:
[INFO] --- maven-clean-plugin:2.5:clean (default-clean) @ maven-chat06 ---
這個表示調用的插件是:maven-clean-plugin,版本是:2.5,插件的目標是:clean
mvn test
該命令調用default生命周期的test階段,實際上會從default生命周期的第一個階段(validate)開始執行一直到test階段結束。這裏面包含了代碼的編譯,運行測試用例。還是和上面的分析過程一樣,對照上面表格中的綁定關係,可以得到mvn test會調用下面一些插件的目標:
maven-resources-plugin:resources
maven-compiler-plugin:compile
maven-resources-plugin:testResources
maven-compiler-plugin:testCompile
maven-surefile-plugin:test
我們來驗證一下,看看是不是和我們分析的一樣:
D:\code\IdeaProjects\maven-chat06>mvn test
[INFO] Scanning for projects...
[INFO]
[INFO] -------------------< com.javacode2018:maven-chat06 >--------------------
[INFO] Building maven-chat06 1.0-SNAPSHOT
[INFO] --------------------------------[ jar ]---------------------------------
[INFO]
[INFO] --- maven-resources-plugin:2.6:resources (default-resources) @ maven-chat06 ---
[INFO] Using 'UTF-8' encoding to copy filtered resources.
[INFO] Copying 0 resource
[INFO]
[INFO] --- maven-compiler-plugin:3.1:compile (default-compile) @ maven-chat06 ---
[INFO] Changes detected - recompiling the module!
[INFO] Compiling 1 source file to D:\code\IdeaProjects\maven-chat06\target\classes
[INFO]
[INFO] --- maven-resources-plugin:2.6:testResources (default-testResources) @ maven-chat06 ---
[INFO] Using 'UTF-8' encoding to copy filtered resources.
[INFO] Copying 0 resource
[INFO]
[INFO] --- maven-compiler-plugin:3.1:testCompile (default-testCompile) @ maven-chat06 ---
[INFO] Changes detected - recompiling the module!
[INFO] Compiling 1 source file to D:\code\IdeaProjects\maven-chat06\target\test-classes
[INFO]
[INFO] --- maven-surefire-plugin:2.12.4:test (default-test) @ maven-chat06 ---
[INFO] Tests are skipped.
[INFO] ------------------------------------------------------------------------
[INFO] BUILD SUCCESS
[INFO] ------------------------------------------------------------------------
[INFO] Total time:  1.880 s
[INFO] Finished at: 2019-11-18T16:36:55+08:00
[INFO] ------------------------------------------------------------------------
從上面輸出中可以看到調用了5個插件的目標,和分析的一樣。
再來看一個跳過測試的例子,如下:
D:\code\IdeaProjects\maven-chat06>mvn test -Dmaven.skip.test=true
[INFO] Scanning for projects...
[INFO]
[INFO] -------------------< com.javacode2018:maven-chat06 >--------------------
[INFO] Building maven-chat06 1.0-SNAPSHOT
[INFO] --------------------------------[ jar ]---------------------------------
[INFO]
[INFO] --- maven-resources-plugin:2.6:resources (default-resources) @ maven-chat06 ---
[INFO] Using 'UTF-8' encoding to copy filtered resources.
[INFO] Copying 0 resource
[INFO]
[INFO] --- maven-compiler-plugin:3.1:compile (default-compile) @ maven-chat06 ---
[INFO] Nothing to compile - all classes are up to date
[INFO]
[INFO] --- maven-resources-plugin:2.6:testResources (default-testResources) @ maven-chat06 ---
[INFO] Using 'UTF-8' encoding to copy filtered resources.
[INFO] Copying 0 resource
[INFO]
[INFO] --- maven-compiler-plugin:3.1:testCompile (default-testCompile) @ maven-chat06 ---
[INFO] Nothing to compile - all classes are up to date
[INFO]
[INFO] --- maven-surefire-plugin:2.12.4:test (default-test) @ maven-chat06 ---
[INFO] Tests are skipped.
[INFO] ------------------------------------------------------------------------
[INFO] BUILD SUCCESS
[INFO] ------------------------------------------------------------------------
[INFO] Total time:  1.384 s
[INFO] Finished at: 2019-11-18T16:38:52+08:00
[INFO] ------------------------------------------------------------------------
上面這個是不是很熟悉,經常用到的跳過測試,為什麼這麼寫,我想大家都知道了吧。
其他幾個mvn compile、mvn install、mvn deploy建議大家也自己去玩玩,加深理解。
自定義綁定
除了默認綁定的一些操作,我們自己也可以將一些階段綁定到指定的插件目標上來完成一些操作,這種自定義綁定讓maven項目在構件的過程中可以執行更多更豐富的操作。
常見的一個案例是:創建項目的源碼jar包,將其安裝到倉庫中,內置插件綁定關係中沒有涉及到這一步的任務,所以需要用戶自己配置。
插件maven-source-plugin的jar-no-fork可以幫助我們完成該任務,我們將這個目標綁定在default生命周期的verify階段上面,這個階段沒有任何默認綁定,verify是在測試完成之後並將構件安裝到本地倉庫之前執行的階段,在這個階段我們生成源碼,配置如下:
在maven-chat06中的pom.xml加入如下配置:
<build>
    <plugins>
        <plugin>
            <groupId>org.apache.maven.plugins</groupId>
            <artifactId>maven-source-plugin</artifactId>
            <version>3.2.0</version>
            <executions>
                <!-- 使用插件需要執行的任務 -->
                <execution>
                    <!-- 任務id -->
                    <id>attach-source</id>
                    <!-- 任務中插件的目標,可以指定多個 -->
                    <goals>
                        <goal>jar-no-fork</goal>
                    </goals>
                    <!-- 綁定的階段 -->
                    <phase>verify</phase>
                </execution>
            </executions>
        </plugin>
    </plugins>
</build>
注意上面配置的attach-source,後面輸出中會有。
id:任務的id,需唯一,如果不指定,默認為default。
每個插件的配置在pom.xml的plugins元素中只能寫一次,否則會有警告。
最終pom.xml如下:
<?xml version="1.0" encoding="UTF-8"?>
<project xmlns="http://maven.apache.org/POM/4.0.0"
         xmlns:xsi="http://www.w3.org/2001/XMLSchema-instance"
         xsi:schemaLocation="http://maven.apache.org/POM/4.0.0 http://maven.apache.org/xsd/maven-4.0.0.xsd">
    <modelVersion>4.0.0</modelVersion>

    <groupId>com.javacode2018</groupId>
    <artifactId>maven-chat06</artifactId>
    <version>1.0-SNAPSHOT</version>
    <packaging>jar</packaging>
    <properties>
        <project.build.sourceEncoding>UTF-8</project.build.sourceEncoding>
        <!-- 配置maven編譯的時候採用的編譯器版本 -->
        <maven.compiler.compilerVersion>1.8</maven.compiler.compilerVersion>
        <!-- 指定源代碼是什麼版本的,如果源碼和這個版本不符將報錯,maven中執行編譯的時候會用到這個配置,默認是1.5,這個相當於javac命令後面的-source參數 -->
        <maven.compiler.source>1.8</maven.compiler.source>
        <!-- 該命令用於指定生成的class文件將保證和哪個版本的虛擬機進行兼容,maven中執行編譯的時候會用到這個配置,默認是1.5,這個相當於javac命令後面的-target參數 -->
        <maven.compiler.target>1.8</maven.compiler.target>
    </properties>

    <dependencies>
        <dependency>
            <groupId>junit</groupId>
            <artifactId>junit</artifactId>
            <version>4.12</version>
            <scope>test</scope>
        </dependency>
    </dependencies>

    <build>
        <plugins>
            <plugin>
                <groupId>org.apache.maven.plugins</groupId>
                <artifactId>maven-source-plugin</artifactId>
                <version>3.2.0</version>
                <executions>
                    <!-- 使用插件需要執行的任務 -->
                    <execution>
                        <!-- 任務id -->
                        <id>attach-source</id>
                        <!-- 任務中插件的目標,可以指定多個 -->
                        <goals>
                            <goal>jar-no-fork</goal>
                        </goals>
                        <!-- 綁定的階段 -->
                        <phase>verify</phase>
                    </execution>
                </executions>
            </plugin>
        </plugins>
    </build>

</project>
運行下面命令:
mvn install
效果:
D:\code\IdeaProjects\maven-chat06>mvn install
[INFO] Scanning for projects...
[INFO]
[INFO] -------------------< com.javacode2018:maven-chat06 >--------------------
[INFO] Building maven-chat06 1.0-SNAPSHOT
[INFO] --------------------------------[ jar ]---------------------------------
[INFO]
[INFO] --- maven-resources-plugin:2.6:resources (default-resources) @ maven-chat06 ---
[INFO] Using 'UTF-8' encoding to copy filtered resources.
[INFO] Copying 0 resource
[INFO]
[INFO] --- maven-compiler-plugin:3.1:compile (default-compile) @ maven-chat06 ---
[INFO] Nothing to compile - all classes are up to date
[INFO]
[INFO] --- maven-resources-plugin:2.6:testResources (default-testResources) @ maven-chat06 ---
[INFO] Using 'UTF-8' encoding to copy filtered resources.
[INFO] Copying 0 resource
[INFO]
[INFO] --- maven-compiler-plugin:3.1:testCompile (default-testCompile) @ maven-chat06 ---
[INFO] Nothing to compile - all classes are up to date
[INFO]
[INFO] --- maven-surefire-plugin:2.12.4:test (default-test) @ maven-chat06 ---
[INFO]
[INFO] --- maven-jar-plugin:2.4:jar (default-jar) @ maven-chat06 ---
[INFO]
[INFO] --- maven-source-plugin:3.2.0:jar-no-fork (attach-source) @ maven-chat06 ---
[INFO]
[INFO] --- maven-install-plugin:2.4:install (default-install) @ maven-chat06 ---
[INFO] Installing D:\code\IdeaProjects\maven-chat06\target\maven-chat06-1.0-SNAPSHOT.jar to C:\Users\Think\.m2\repository\com\javacode2018\maven-chat06\1.0-SNAPSHOT\maven-chat06-1.0-SNAPSHOT.jar
[INFO] Installing D:\code\IdeaProjects\maven-chat06\pom.xml to C:\Users\Think\.m2\repository\com\javacode2018\maven-chat06\1.0-SNAPSHOT\maven-chat06-1.0-SNAPSHOT.pom
[INFO] Installing D:\code\IdeaProjects\maven-chat06\target\maven-chat06-1.0-SNAPSHOT-sources.jar to C:\Users\Think\.m2\repository\com\javacode2018\maven-chat06\1.0-SNAPSHOT\maven-chat06-1.0-SNAPSHOT-sources.jar
[INFO] ------------------------------------------------------------------------
[INFO] BUILD SUCCESS
[INFO] ------------------------------------------------------------------------
[INFO] Total time:  2.268 s
[INFO] Finished at: 2019-11-18T16:59:12+08:00
[INFO] ------------------------------------------------------------------------
上面有個輸出如下:
maven-source-plugin:3.2.0:jar-no-fork (attach-source) @ maven-chat06 ---
可以看出調用了我們配置的插件生成源碼jar,上面的括號中的attach-source就是pom.xml中配置的任務id。
最後有個輸出:
[INFO] Installing D:\code\IdeaProjects\maven-chat06\target\maven-chat06-1.0-SNAPSHOT-sources.jar to C:\Users\Think\.m2\repository\com\javacode2018\maven-chat06\1.0-SNAPSHOT\maven-chat06-1.0-SNAPSHOT-sources.jar
可以看到將源碼安裝到本地倉庫了。
有些插件的目標默認會綁定到一些生命周期的階段中,那麼如果剛好插件默認綁定的階段和上面配置的一致,那麼上面phase元素可以不寫了,那麼怎麼查看插件的默認綁定呢?
mvn help:describe -Dplugin=插件goupId:插件artifactId[:插件version] -Dgoal=目標名稱 -Ddetail
mvn help:describe -Dplugin=插件前綴 -Dgoal=目標名稱 -Ddetail
我們看一下插件source的jar-no-fork目標默認的綁定:
D:\code\IdeaProjects\maven-chat06>mvn help:describe -Dplugin=source -Dgoal=jar-no-fork -Ddetail
[INFO] Scanning for projects...
[INFO]
[INFO] -------------------< com.javacode2018:maven-chat06 >--------------------
[INFO] Building maven-chat06 1.0-SNAPSHOT
[INFO] --------------------------------[ jar ]---------------------------------
[INFO]
[INFO] --- maven-help-plugin:3.2.0:describe (default-cli) @ maven-chat06 ---
[INFO] Mojo: 'source:jar-no-fork'
source:jar-no-fork
  Description: This goal bundles all the sources into a jar archive. This
    goal functions the same as the jar goal but does not fork the build and is
    suitable for attaching to the build lifecycle.
  Implementation: org.apache.maven.plugins.source.SourceJarNoForkMojo
  Language: java
  Bound to phase: package
上面輸出中有個Bound to phase: package,表示默認綁定在了package階段上。
我們知道3套生命周期的運行時沒有依賴的,但是每套中的階段是有先後順序的,運行某個階段的時候,會先執行他前面所有的階段。清理代碼使用的是clean周期中的clean階段,編譯代碼用的是default周期中的compile階段,當直接運行mvn compile編譯代碼的時候並不會去清理代碼,編譯代碼的時候若發現文件沒有變動,會跳過沒有變化的文件進行編譯。如果我們想每次編譯之前強制先清理代碼,我們經常這麼寫:
mvn clean compile
上面的寫法是不是很熟悉,運行一下看看效果:
D:\code\IdeaProjects\maven-chat06>mvn clean compile
[INFO] Scanning for projects...
[INFO]
[INFO] -------------------< com.javacode2018:maven-chat06 >--------------------
[INFO] Building maven-chat06 1.0-SNAPSHOT
[INFO] --------------------------------[ jar ]---------------------------------
[INFO]
[INFO] --- maven-clean-plugin:2.5:clean (default-clean) @ maven-chat06 ---
[INFO] Deleting D:\code\IdeaProjects\maven-chat06\target
[INFO]
[INFO] --- maven-resources-plugin:2.6:resources (default-resources) @ maven-chat06 ---
[INFO] Using 'UTF-8' encoding to copy filtered resources.
[INFO] Copying 0 resource
[INFO]
[INFO] --- maven-compiler-plugin:3.1:compile (default-compile) @ maven-chat06 ---
[INFO] Changes detected - recompiling the module!
[INFO] Compiling 1 source file to D:\code\IdeaProjects\maven-chat06\target\classes
[INFO] ------------------------------------------------------------------------
[INFO] BUILD SUCCESS
[INFO] ------------------------------------------------------------------------
[INFO] Total time:  1.666 s
[INFO] Finished at: 2019-11-18T17:16:53+08:00
[INFO] ------------------------------------------------------------------------
還有其他方式么?
我們剛才學了自定義綁定,我們可以在default生命周期的第一個階段validate綁定清理代碼的插件,那我們來通過自定義綁定來實現一下,project->build->plugins元素中加入下面配置:
<plugin>
    <groupId>org.apache.maven.plugins</groupId>
    <artifactId>maven-clean-plugin</artifactId>
    <version>2.5</version>
    <executions>
        <!-- 使用插件需要執行的任務 -->
        <execution>
            <!-- 任務中插件的目標,可以指定多個 -->
            <id>clean-target</id>
            <goals>
                <goal>clean</goal>
            </goals>
            <!-- 綁定的階段 -->
            <phase>validate</phase>
        </execution>
    </executions>
</plugin>
運行下面命令看效果:
D:\code\IdeaProjects\maven-chat06>mvn compile
[INFO] Scanning for projects...
[INFO]
[INFO] -------------------< com.javacode2018:maven-chat06 >--------------------
[INFO] Building maven-chat06 1.0-SNAPSHOT
[INFO] --------------------------------[ jar ]---------------------------------
[INFO]
[INFO] --- maven-clean-plugin:2.5:clean (clean-target) @ maven-chat06 ---
[INFO] Deleting D:\code\IdeaProjects\maven-chat06\target
[INFO]
[INFO] --- maven-resources-plugin:2.6:resources (default-resources) @ maven-chat06 ---
[INFO] Using 'UTF-8' encoding to copy filtered resources.
[INFO] Copying 0 resource
[INFO]
[INFO] --- maven-compiler-plugin:3.1:compile (default-compile) @ maven-chat06 ---
[INFO] Changes detected - recompiling the module!
[INFO] Compiling 1 source file to D:\code\IdeaProjects\maven-chat06\target\classes
[INFO] ------------------------------------------------------------------------
[INFO] BUILD SUCCESS
[INFO] ------------------------------------------------------------------------
[INFO] Total time:  1.630 s
[INFO] Finished at: 2019-11-18T17:22:37+08:00
[INFO] ------------------------------------------------------------------------
輸出中有:
[INFO] --- maven-clean-plugin:2.5:clean (clean-target) @ maven-chat06 ---
[INFO] Deleting D:\code\IdeaProjects\maven-chat06\target
這個表示運行了代碼清理的功能,進行了代碼清理,是不是感覺很爽,不用每次都寫clean了。
POM.xml插件配置詳解
插件目標共享參數配置
build->plugins->plugin中配置:
<!-- 插件參數配置,對插件中所有的目標起效 -->
<configuration>
    <目標參數名>參數值</目標參數名>
</configuration>
configuration節點下配置目標參數的值,節點名稱為目標的參數名稱,上面這種配置對當前插件的所有目標起效,也就是說這個插件中所有的目標共享此參數配置。
案例:
將案例中的pom.xml中的build元素修改成下面這樣。
<build>
    <plugins>
        <plugin>
            <groupId>org.apache.maven.plugins</groupId>
            <artifactId>maven-surefire-plugin</artifactId>
            <version>2.12.4</version>
            <!-- 插件參數配置,對插件中所有的目標起效 -->
            <configuration>
                <skip>true</skip>
            </configuration>
        </plugin>
    </plugins>
</build>
運行下面命令,看效果:
D:\code\IdeaProjects\maven-chat06>mvn test
[INFO] Scanning for projects...
[INFO]
[INFO] -------------------< com.javacode2018:maven-chat06 >--------------------
[INFO] Building maven-chat06 1.0-SNAPSHOT
[INFO] --------------------------------[ jar ]---------------------------------
[INFO]
[INFO] --- maven-resources-plugin:2.6:resources (default-resources) @ maven-chat06 ---
[INFO] Using 'UTF-8' encoding to copy filtered resources.
[INFO] Copying 0 resource
[INFO]
[INFO] --- maven-compiler-plugin:3.1:compile (default-compile) @ maven-chat06 ---
[INFO] Nothing to compile - all classes are up to date
[INFO]
[INFO] --- maven-resources-plugin:2.6:testResources (default-testResources) @ maven-chat06 ---
[INFO] Using 'UTF-8' encoding to copy filtered resources.
[INFO] Copying 0 resource
[INFO]
[INFO] --- maven-compiler-plugin:3.1:testCompile (default-testCompile) @ maven-chat06 ---
[INFO] Nothing to compile - all classes are up to date
[INFO]
[INFO] --- maven-surefire-plugin:2.12.4:test (default-test) @ maven-chat06 ---
[INFO] Tests are skipped.
[INFO] ------------------------------------------------------------------------
[INFO] BUILD SUCCESS
[INFO] ------------------------------------------------------------------------
[INFO] Total time:  1.328 s
[INFO] Finished at: 2019-11-18T17:30:58+08:00
[INFO] ------------------------------------------------------------------------
可以看到Test are skipped,說明跳過了測試,到此為止,跳過測試已經講了3種了:
1. mvn -Dmaven.test.skip=tue
2. properties中配置<maven.test.skip>true</maven.test.skip>
3. build中配置插件參數的方式
上面這個配置參數方式對當前插件的所有目標有效,如果想對指定的目標進行配置呢,用下面的方式。
插件目標參數配置
project->build->plugins->plugin->executions->execution元素中進行配置,如下:
<!-- 這個地方配置只對當前任務有效 -->
<configuration>
    <目標參數名>參數值</目標參數名>
</configuration>
上面這種配置常用於自定義插件綁定,只對當前任務有效。
感受一下效果,將pom.xml中的build元素改為下面內容:
<build>
    <plugins>
        <plugin>
            <groupId>org.apache.maven.plugins</groupId>
            <artifactId>maven-surefire-plugin</artifactId>
            <version>2.12.4</version>
            <executions>
                <execution>
                    <goals>
                        <goal>test</goal>
                        <goal>help</goal>
                    </goals>
                    <phase>pre-clean</phase>
                    <!-- 這個地方配置只對當前任務有效 -->
                    <configuration>
                        <skip>true</skip>
                    </configuration>
                </execution>
            </executions>
        </plugin>
    </plugins>
</build>
上面自定義了一個綁定,在clean周期的pre-clean階段綁定了插件maven-surefire-plugin的兩個目標test和help,execution元素沒有指定id,所以默認id是default。
運行下面命令,見效果:
D:\code\IdeaProjects\maven-chat06>mvn pre-clean
[INFO] Scanning for projects...
[INFO]
[INFO] -------------------< com.javacode2018:maven-chat06 >--------------------
[INFO] Building maven-chat06 1.0-SNAPSHOT
[INFO] --------------------------------[ jar ]---------------------------------
[INFO]
[INFO] --- maven-surefire-plugin:2.12.4:test (default) @ maven-chat06 ---
[INFO] Tests are skipped.
[INFO]
[INFO] --- maven-surefire-plugin:2.12.4:help (default) @ maven-chat06 ---
[INFO] Maven Surefire Plugin 2.12.4
  Surefire is a test framework project.

This plugin has 2 goals:

surefire:help
  Display help information on maven-surefire-plugin.
  Call mvn surefire:help -Ddetail=true -Dgoal=<goal-name> to display parameter
  details.

surefire:test
  Run tests using Surefire.


[INFO] ------------------------------------------------------------------------
[INFO] BUILD SUCCESS
[INFO] ------------------------------------------------------------------------
[INFO] Total time:  0.738 s
[INFO] Finished at: 2019-11-18T17:41:08+08:00
[INFO] ------------------------------------------------------------------------
可以看到上面輸出中運行了插件的兩個目標,和預期結果一致。
獲取maven插件信息
上面我們介紹了,可以通過下面命令獲取插件詳細介紹信息
mvn help:describe -Dplugin=插件goupId:插件artifactId[:插件version] -Dgoal=目標名稱 -Ddetail
mvn help:describe -Dplugin=插件前綴 -Dgoal=目標名稱 -Ddetail
更多maven插件的幫助文檔可以參考maven的官方網站,上面有詳細的介紹,建議大家去看看,地址:
http://maven.apache.org/plugins/
插件解析機制
為了方便用戶使用和配置插件,maven不需要用戶提供完整的插件坐標信息,就可以解析到正確的插件,不過我建議使用插件配置的時候最好還是配置完整的坐標信息,不然不利於新人的理解和問題的排查。
插件倉庫
與其他maven構件一樣,插件構件也是基於坐標存儲在maven倉庫中,有需要的時候,maven會從本地查找插件,如果不存在,則到遠程倉庫查找,找到了以後下載到本地倉庫,然後使用。
大家回憶一下,上一章講過的,pom.xml中可以配置依賴的構件的倉庫地址,如下:
<repositories>
    <repository>
        <id>maven-nexus</id>
        <url>http://localhost:8081/repository/maven-public/</url>
        <releases>
            <enabled>true</enabled>
        </releases>
        <snapshots>
            <enabled>true</enabled>
        </snapshots>
    </repository>
</repositories>
但是插件倉庫的配置和這個有一點不一樣,插件的是在pluginRepositories->pluginRepository元素中配置的,如下:
<pluginRepositories>
    <pluginRepository>
        <id>myplugin-repository</id>
        <url>http://repo1.maven.org/maven2/</url>
        <releases>
            <enabled>true</enabled>
        </releases>
    </pluginRepository>
</pluginRepositories>
看一下上面2段配置,repository中的配置和pluginRepository中的子元素是一樣的,這個主意下就可以了。
插件的默認groupId
在pom.xml中配置插件的時候,如果是官方的插件,可以省略groupId。
案例:
修改本篇示例中的pom.xml,如下:
<?xml version="1.0" encoding="UTF-8"?>
<project xmlns="http://maven.apache.org/POM/4.0.0"
         xmlns:xsi="http://www.w3.org/2001/XMLSchema-instance"
         xsi:schemaLocation="http://maven.apache.org/POM/4.0.0 http://maven.apache.org/xsd/maven-4.0.0.xsd">
    <modelVersion>4.0.0</modelVersion>

    <groupId>com.javacode2018</groupId>
    <artifactId>maven-chat06</artifactId>
    <version>1.0-SNAPSHOT</version>
    <packaging>jar</packaging>

    <properties>
        <project.build.sourceEncoding>UTF-8</project.build.sourceEncoding>
    </properties>

    <build>
        <plugins>
            <plugin>
                <artifactId>maven-compiler-plugin</artifactId>
                <version>3.1</version>
                <configuration>
                    <compilerVersion>1.8</compilerVersion>
                    <source>1.8</source>
                    <target>1.8</target>
                </configuration>
            </plugin>
        </plugins>
    </build>

</project>
上面用到了maven-compiler-plugin,這個插件是編譯代碼的,是maven官方提供的插件,我們省略了groupId。
上面這個插件用於編譯代碼的,編譯代碼的時候需要指定編譯器的版本,源碼的版本,目標代碼的版本,都是用的是1.8。
大家回頭去看一下,文章最開始的時候,在properties中有幾個屬性值是1.8的配置,這幾個值默認會被maven-compiler-plugin這個插件的上面3個參數獲取,具體可以去看一下這個插件compile目標的參數說明。
運行下面命令:
D:\code\IdeaProjects\maven-chat06>mvn clean compile
[INFO] Scanning for projects...
[INFO]
[INFO] -------------------< com.javacode2018:maven-chat06 >--------------------
[INFO] Building maven-chat06 1.0-SNAPSHOT
[INFO] --------------------------------[ jar ]---------------------------------
[INFO]
[INFO] --- maven-clean-plugin:2.5:clean (default-clean) @ maven-chat06 ---
[INFO] Deleting D:\code\IdeaProjects\maven-chat06\target
[INFO]
[INFO] --- maven-resources-plugin:2.6:resources (default-resources) @ maven-chat06 ---
[INFO] Using 'UTF-8' encoding to copy filtered resources.
[INFO] Copying 0 resource
[INFO]
[INFO] --- maven-compiler-plugin:3.1:compile (default-compile) @ maven-chat06 ---
[INFO] Changes detected - recompiling the module!
[INFO] Compiling 1 source file to D:\code\IdeaProjects\maven-chat06\target\classes
[INFO] ------------------------------------------------------------------------
[INFO] BUILD SUCCESS
[INFO] ------------------------------------------------------------------------
[INFO] Total time:  1.692 s
[INFO] Finished at: 2019-11-18T18:11:34+08:00
[INFO] ------------------------------------------------------------------------
可以看到可以正常運行。
上面pom.xml省略了插件的groupId配置,如下:
<groupId>org.apache.maven.plugins</groupId>
maven在解析該插件的時候,會自動給這個插件補上默認的官方的groupId,所以可以正常運行,但是不建議大家這麼使用,容易讓新手比較懵逼。
插件前綴的解析
前面說過了使用mvn命令調用插件的時候,可以使用插件的前綴來代替繁瑣的插件坐標的方式,那麼maven是如何根據插件的前綴找到對應的插件的呢?
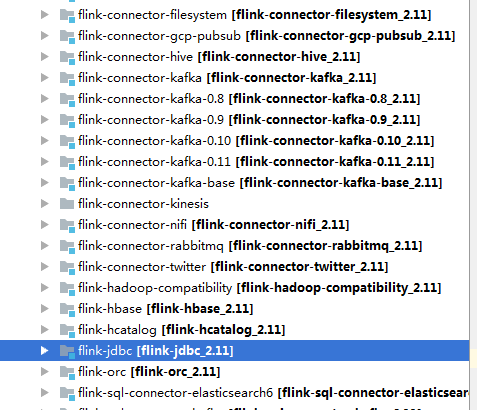
插件前綴與插件groupId:artifactId是一一對應的關係,這個關係的配置存儲在倉庫的元數據中,元數據位於下面2個xml中:
~/.m2/repository/org/apache/maven/plugins/maven-metadata-central.xml
~/.m2/repository/org/codehaus/mojo/maven-metadata-central.xml
接幾個圖,大家感受一下:
也可以通過在settings.xml中配置,讓maven檢查其他grouId上的插件元數據中前綴和插件關係的配置,如下:
<settings>
  <pluginGroups>
    <pluginGroup>com.your.plugins</pluginGroup>
  </pluginGroups>
</settings>
pluginGroups中有多個pluginGroup,可以配置你自己插件的元數據所在的groupId,然後可以通過前綴來訪問你自己的插件元數據目錄,此處先不細說,這個後面文章中講自定義插件的時候會再次說明。
查看項目最終pom.xml文件
我們的pom.xml默認會繼承maven頂級的一個父類pom.xml,頂級的pom.xml中指定了很多默認的配置,如生命周期中的階段和很多插件的綁定,這些如果我們想看到,到哪裡看呢?
mvn命令在項目中執行的時候,我們的pom.xml和父類的pom.xml最終會進行合併,當我們的pom.xml寫的比較複雜的時候,最終合併之後是什麼效果呢,我們可以通過下面這個命令查看:
mvn help:effective-pom
效果:
D:\code\IdeaProjects\maven-chat06>mvn help:effective-pom > 1.xml
上面我們將命令產生的結果輸出到項目的1.xml文件中了,我們看一下項目的1.xml的內容:
<?xml version="1.0" encoding="GBK"?>
<!-- ====================================================================== -->
<!--                                                                        -->
<!-- Generated by Maven Help Plugin on 2019-11-18T18:41:40+08:00            -->
<!-- See: http://maven.apache.org/plugins/maven-help-plugin/                -->
<!--                                                                        -->
<!-- ====================================================================== -->
<!-- ====================================================================== -->
<!--                                                                        -->
<!-- Effective POM for project                                              -->
<!-- 'com.javacode2018:maven-chat06:jar:1.0-SNAPSHOT'                       -->
<!--                                                                        -->
<!-- ====================================================================== -->
<project xmlns="http://maven.apache.org/POM/4.0.0" xmlns:xsi="http://www.w3.org/2001/XMLSchema-instance"
         xsi:schemaLocation="http://maven.apache.org/POM/4.0.0 http://maven.apache.org/xsd/maven-4.0.0.xsd">
    <modelVersion>4.0.0</modelVersion>
    <groupId>com.javacode2018</groupId>
    <artifactId>maven-chat06</artifactId>
    <version>1.0-SNAPSHOT</version>
    <properties>
        <project.build.sourceEncoding>UTF-8</project.build.sourceEncoding>
    </properties>
    <repositories>
        <repository>
            <snapshots>
                <enabled>false</enabled>
            </snapshots>
            <id>central</id>
            <name>Central Repository</name>
            <url>https://repo.maven.apache.org/maven2</url>
        </repository>
    </repositories>
    <pluginRepositories>
        <pluginRepository>
            <releases>
                <updatePolicy>never</updatePolicy>
            </releases>
            <snapshots>
                <enabled>false</enabled>
            </snapshots>
            <id>central</id>
            <name>Central Repository</name>
            <url>https://repo.maven.apache.org/maven2</url>
        </pluginRepository>
    </pluginRepositories>
    <build>
        <sourceDirectory>D:\code\IdeaProjects\maven-chat06\src\main\java</sourceDirectory>
        <scriptSourceDirectory>D:\code\IdeaProjects\maven-chat06\src\main\scripts</scriptSourceDirectory>
        <testSourceDirectory>D:\code\IdeaProjects\maven-chat06\src\test\java</testSourceDirectory>
        <outputDirectory>D:\code\IdeaProjects\maven-chat06\target\classes</outputDirectory>
        <testOutputDirectory>D:\code\IdeaProjects\maven-chat06\target\test-classes</testOutputDirectory>
        <resources>
            <resource>
                <directory>D:\code\IdeaProjects\maven-chat06\src\main\resources</directory>
            </resource>
        </resources>
        <testResources>
            <testResource>
                <directory>D:\code\IdeaProjects\maven-chat06\src\test\resources</directory>
            </testResource>
        </testResources>
        <directory>D:\code\IdeaProjects\maven-chat06\target</directory>
        <finalName>maven-chat06-1.0-SNAPSHOT</finalName>
        <pluginManagement>
            <plugins>
                <plugin>
                    <artifactId>maven-antrun-plugin</artifactId>
                    <version>1.3</version>
                </plugin>
                <plugin>
                    <artifactId>maven-assembly-plugin</artifactId>
                    <version>2.2-beta-5</version>
                </plugin>
                <plugin>
                    <artifactId>maven-dependency-plugin</artifactId>
                    <version>2.8</version>
                </plugin>
                <plugin>
                    <artifactId>maven-release-plugin</artifactId>
                    <version>2.5.3</version>
                </plugin>
            </plugins>
        </pluginManagement>
        <plugins>
            <plugin>
                <artifactId>maven-compiler-plugin</artifactId>
                <version>3.1</version>
                <executions>
                    <execution>
                        <id>default-compile</id>
                        <phase>compile</phase>
                        <goals>
                            <goal>compile</goal>
                        </goals>
                        <configuration>
                            <compilerVersion>1.8</compilerVersion>
                            <source>1.8</source>
                            <target>1.8</target>
                        </configuration>
                    </execution>
                    <execution>
                        <id>default-testCompile</id>
                        <phase>test-compile</phase>
                        <goals>
                            <goal>testCompile</goal>
                        </goals>
                        <configuration>
                            <compilerVersion>1.8</compilerVersion>
                            <source>1.8</source>
                            <target>1.8</target>
                        </configuration>
                    </execution>
                </executions>
                <configuration>
                    <compilerVersion>1.8</compilerVersion>
                    <source>1.8</source>
                    <target>1.8</target>
                </configuration>
            </plugin>
            <plugin>
                <artifactId>maven-clean-plugin</artifactId>
                <version>2.5</version>
                <executions>
                    <execution>
                        <id>default-clean</id>
                        <phase>clean</phase>
                        <goals>
                            <goal>clean</goal>
                        </goals>
                    </execution>
                </executions>
            </plugin>
            <plugin>
                <artifactId>maven-resources-plugin</artifactId>
                <version>2.6</version>
                <executions>
                    <execution>
                        <id>default-testResources</id>
                        <phase>process-test-resources</phase>
                        <goals>
                            <goal>testResources</goal>
                        </goals>
                    </execution>
                    <execution>
                        <id>default-resources</id>
                        <phase>process-resources</phase>
                        <goals>
                            <goal>resources</goal>
                        </goals>
                    </execution>
                </executions>
            </plugin>
            <plugin>
                <artifactId>maven-jar-plugin</artifactId>
                <version>2.4</version>
                <executions>
                    <execution>
                        <id>default-jar</id>
                        <phase>package</phase>
                        <goals>
                            <goal>jar</goal>
                        </goals>
                    </execution>
                </executions>
            </plugin>
            <plugin>
                <artifactId>maven-surefire-plugin</artifactId>
                <version>2.12.4</version>
                <executions>
                    <execution>
                        <id>default-test</id>
                        <phase>test</phase>
                        <goals>
                            <goal>test</goal>
                        </goals>
                    </execution>
                </executions>
            </plugin>
            <plugin>
                <artifactId>maven-install-plugin</artifactId>
                <version>2.4</version>
                <executions>
                    <execution>
                        <id>default-install</id>
                        <phase>install</phase>
                        <goals>
                            <goal>install</goal>
                        </goals>
                    </execution>
                </executions>
            </plugin>
            <plugin>
                <artifactId>maven-deploy-plugin</artifactId>
                <version>2.7</version>
                <executions>
                    <execution>
                        <id>default-deploy</id>
                        <phase>deploy</phase>
                        <goals>
                            <goal>deploy</goal>
                        </goals>
                    </execution>
                </executions>
            </plugin>
            <plugin>
                <artifactId>maven-site-plugin</artifactId>
                <version>3.3</version>
                <executions>
                    <execution>
                        <id>default-site</id>
                        <phase>site</phase>
                        <goals>
                            <goal>site</goal>
                        </goals>
                        <configuration>
                            <outputDirectory>D:\code\IdeaProjects\maven-chat06\target\site</outputDirectory>
                            <reportPlugins>
                                <reportPlugin>
                                    <groupId>org.apache.maven.plugins</groupId>
                                    <artifactId>maven-project-info-reports-plugin</artifactId>
                                </reportPlugin>
                            </reportPlugins>
                        </configuration>
                    </execution>
                    <execution>
                        <id>default-deploy</id>
                        <phase>site-deploy</phase>
                        <goals>
                            <goal>deploy</goal>
                        </goals>
                        <configuration>
                            <outputDirectory>D:\code\IdeaProjects\maven-chat06\target\site</outputDirectory>
                            <reportPlugins>
                                <reportPlugin>
                                    <groupId>org.apache.maven.plugins</groupId>
                                    <artifactId>maven-project-info-reports-plugin</artifactId>
                                </reportPlugin>
                            </reportPlugins>
                        </configuration>
                    </execution>
                </executions>
                <configuration>
                    <outputDirectory>D:\code\IdeaProjects\maven-chat06\target\site</outputDirectory>
                    <reportPlugins>
                        <reportPlugin>
                            <groupId>org.apache.maven.plugins</groupId>
                            <artifactId>maven-project-info-reports-plugin</artifactId>
                        </reportPlugin>
                    </reportPlugins>
                </configuration>
            </plugin>
        </plugins>
    </build>
    <reporting>
        <outputDirectory>D:\code\IdeaProjects\maven-chat06\target\site</outputDirectory>
    </reporting>
</project>
上面這個文件,大家一定要認真多看幾遍,理解一下,裡面包含太多東西,再重複一下,上面的文件多看幾遍!多看幾遍!多看幾遍!要理解!
課後題
留給大家2個問題
-
下面這個配置是干什麼的?給哪個插件使用的?
<properties>
    <project.build.sourceEncoding>UTF-8</project.build.sourceEncoding>
</properties>
-
mvn test運行測試用例的時候,測試用例類名的寫法默認是有規則的,這些規則有人知道么?從哪裡可以看到這些規則?如何自定義?
大家可以留言或者在技術群討論。
總結
本文內容比較多,希望大家多讀幾遍,要理解。如果有收穫的幫忙分享一下,你們的支持也是我不斷輸出的一個動力,希望大家都能夠學到東西!
Maven系列目錄
更多好文章
本站聲明:網站內容來源於博客園,如有侵權,請聯繫我們,我們將及時處理
【其他文章推薦】
※網頁設計公司推薦更多不同的設計風格,搶佔消費者視覺第一線
※廣告預算用在刀口上,網站設計公司幫您達到更多曝光效益
※自行創業 缺乏曝光? 下一步"網站設計"幫您第一時間規劃公司的門面形象
※台灣寄大陸海運貨物規則及重量限制?
※大陸寄台灣海運費用試算一覽表
※台中搬家,彰化搬家,南投搬家前需注意的眉眉角角,別等搬了再說!